
Hand Polishing a Mould: Climbing the Grit Ladder and Reading the A1 to C3 Grades
Mould polishing is a ladder from coarse to fine, and every step does exactly one thing: replace the marks left by the step before with finer ones. Skipping a step does not save time; it only means the fine step grinds for a long while and the surface still looks cloudy. This covers four things: how hand polishing differs from a buffing machine, what the A1 to C3 grades your customer quotes actually mean, how the grit ladder runs from tool-mark removal to mirror finish, and how to tell that the previous grit really is gone.
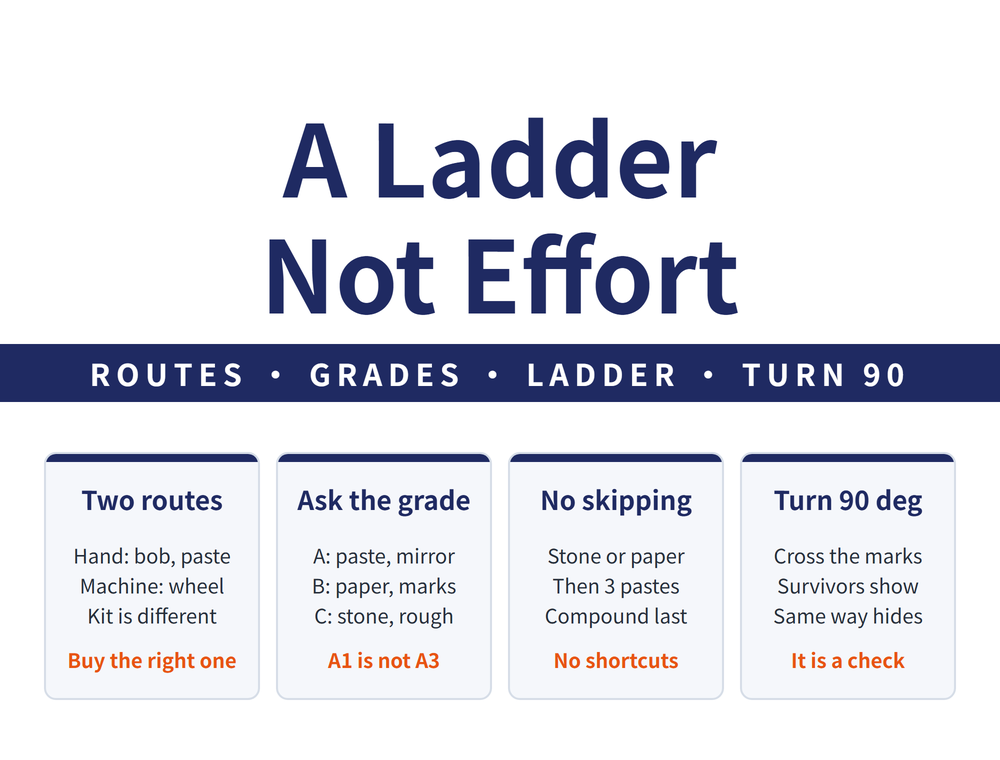
1. First, which one do you actually want: hand polishing or a buffing machine
Both are called polishing, yet the tools, the consumables and the situations they suit are completely different. Buy the wrong set and you will not reach the finish you wanted.
| Item | Mould hand polishing (this article) | Buffing machine |
|---|---|---|
| Tools | Felt bob on an air tool, oilstones, self-adhesive wet-or-dry paper | Buffing wheels, abrasive belts, a cloth wheel driven by a lathe |
| Consumables | Mainly diamond paste, finished off with polishing compound | White, red and green oxide-based compounds |
| Where it fits | One-off finishing, cavities and tight corners | High-volume continuous production |
For the machine route, see Buffing After Grinding: Choosing the Wheel, the Speed and the Compound. If the job is a batch of small parts to deburr rather than a cavity to finish, that is a different route again, covered in Barrel Finishing or Brushing: Choosing the Route for Bulk Deburring and Surface Finish.
Surface requirements on a drawing are given as Ra, Rz or Ry plus a number. A surface with roughness Ra below 0.8µm is generally called a mirror finish — that is the dividing line for whether an A grade is needed at all.
2. The customer says "A grade" — but which one
Mould polishing has a widely used grade system: three families, A, B and C, with three levels each, nine in total. It plays the same role as HRC for steel or a tolerance class for threads: a shared vocabulary for stating a requirement. Confirm the exact level before quoting — within the A family, A1 and A3 differ greatly in hours.
| Grade | Worked with | Roughness | How the surface looks |
|---|---|---|---|
| A1 | 3# diamond paste | 0-1 | Mirror or optical requirement |
| A2 | 6# diamond paste | 1-2 | Takes a long time to reach |
| A3 | 15# diamond paste | 2-3 | Demands high steel quality |
| B1 | 600# paper | 2-3 | All machining marks removed |
| B2 | 400# paper | 4-5 | Better release |
| B3 | 320# paper | 9-10 | Dull reflection |
| C1 | 600# oilstone | 10-12 | All machining marks removed |
| C2 | 400# oilstone | 25-28 | Better release |
| C3 | 320# oilstone | 38-42 | No reflection, no gloss |
⚠ The roughness column below carries no unit. Both conventions are in use in the trade (micrometres, µm, and microinches, µin). The figures are reproduced as given; no conversion and no unit have been added. For acceptance, follow the drawing and whatever the two parties have confirmed in writing.
The split between the three families is clear. A is diamond paste, the only family that reaches a mirror. B is abrasive paper, mainly clearing machining marks and improving release. C is oilstone, which is really the tool-mark removal stage before polishing begins. When a customer says "C is fine", it usually means take the tool marks off and leave it matt.
3. The grit ladder: seven to eight stages from tool marks to mirror
The whole sequence follows one rule: each stage does one thing, replacing the marks from the stage before with finer marks. The order is fixed and the grit roughly doubles at each step.
| Stage | What you use | What this stage is for |
|---|---|---|
| 1 Tool marks | Self-adhesive wet-or-dry paper #220-#400, or a #400 oilstone | Level the machining marks; working at 45°-90° across them works better |
| 2 Faster removal | #400 fibre stone on a reciprocating air tool | Saves time over larger areas |
| 3 Sanding | Self-adhesive wet-or-dry paper #800 | Bring the texture down |
| 4 Pre-polish | Self-adhesive wet-or-dry paper #1000 | Last paper stage before diamond paste |
| 5-7 Three paste steps | Diamond paste #1200 → #2000 → #3000 on a rotary air tool with a felt bob | The three steps that actually refine the surface |
| 8 Mirror | Polishing compound with a felt bob | Final gloss |
| 9 Clean | Cotton pad with kerosene | Clear residue off the polished face |
Make two judgements before you start: what surface roughness the drawing asks for, which sets how far up the ladder you go, and how deep the existing tool marks are, which sets where you start. Starting too fine means using fine paper to attack coarse marks, and all the time goes into stage one.
4. Turn ninety degrees when you change grit
Changing grit comes with one move that looks redundant and is in fact the inspection step:
Every time you change grit, turn the working direction 90° so it is perpendicular to the marks from the previous stage. Any surviving mark from that stage then shows up as a line running the wrong way. Work in the same direction and the new marks simply cover the old ones, and you cannot tell whether they are gone.
⚠ The grit sequences recorded in shop notes are not consistent. One runs 320 → 1000 → 1200 → 1500 and then diamond paste 1500 → 8000 → 14000; another goes from #1000 paper straight to #3000 diamond paste and then to #8000. These are individual habits shaped by the material and the accuracy needed; they are set out side by side here and not reconciled. Skipping grits does save steps, but only if you are sure the previous one is genuinely clean.
5. Two details usually treated as trivial
| Detail | How it is done |
|---|---|
| Fold the paper | #1000 folded two to four times; #1200 and above at least twice, #1500 four times. Cut it slightly wider than the handle so corners are easier to reach |
| Keep the file flat | If the file used beforehand is not flat itself, it transfers that unevenness to the workpiece. Radiused corners are worked with the file folded concave; special shapes need a precision flat-taper file |
For file sections, cuts and grades, see Reading a File: Section, Cut and Grade.
6. Consumables: what the old hands substitute, and choosing brush fill
A few things about consumables rarely appear in a textbook, yet they move the cost directly:
| Item | What the shop floor says |
|---|---|
| Polishing fluid | Stator oil, kerosene, machine oil or diesel all work; a dedicated polishing fluid is not obligatory |
| The "paste" in diamond paste | The carrier is petroleum jelly; the diamond grit is the abrasive. Some sharp-cutting pastes thin with water instead of oil |
| Final gloss | Comes from a cotton pad, folded in four |
| Felt bobs and felt | Available soft or hard and coarse or fine, used with diamond paste or compound |
⚠ The table above records shop-floor experience and substitutions, not manufacturers' official recommendations. Try a substitute on a small area first and confirm both the result and the compatibility before using it on a job.
Brush fill is chosen by the base material. Nylon suits wood and metal, and the same material comes in two colours — black is coarser, white is finer — with white used on stainless steel and aluminium. Horsehair is for leather. Hog bristle is for mirror work. These are brushes for hand polishing; the wire and nylon brush wheels used for bulk deburring are a separate specification set, covered in the barrel finishing article linked above.
7. Safety: four rules with no room for discussion
Polishing means a high-speed rotating tool working close to the hand. These four are not negotiable:
| Rule | Why |
|---|---|
| No cotton gloves when operating polishing tools | Cotton gloves are easily drawn into a high-speed rotating tool; this is a serious hazard |
| Wear a mask, eye protection and ear plugs | Polishing generates dust and noise |
| Shut off the air supply or power before changing a bob or stone | Residual pressure in an air tool can start it unexpectedly |
| Clear the area before driving a cloth wheel from a lathe | Loose items nearby will be caught or thrown |
8. Frequently Asked Questions (FAQ)
Q: Can I start at a fine grit and skip the earlier stages?
Not advisable. A fine grit removes very little, so using it on deep tool marks simply spends the time in stage one and the marks stay. The starting grit follows the depth of the existing marks, not the finish you are aiming for.
Q: How do I know the previous grit is fully worked out?
Turn 90 degrees at each grit change so you work across the previous marks. Once no lines running the other way remain, that stage has been covered. Working in the same direction hides the old marks under the new ones.
Q: A customer asks for A grade polishing. What should the quote allow for?
Ask whether it is A1, A2 or A3; the hours differ greatly between them, and the A family also demands high steel quality. Quoting against "A grade" without a level is the most common source of pricing error.
Q: Can hand polishing and a buffing machine replace each other?
No. Hand polishing uses a felt bob with diamond paste for one-off work, cavities and corners. A buffing machine runs oxide-based compound for high-volume continuous production. The tools, the consumables and the situations are all different.
This article belongs to the line covered in Deburring and Surface Finishing: The Complete Guide - Which Tool, Which Material, and What to Do in Volume, which shows where to start and where to go next.
Published: 2026-09-18|Updated: 2026-09-18









