
The Moment a Drill Breaks Through: Exit Burrs, Thin-Plate Deflection and Cross-Hole Chipping
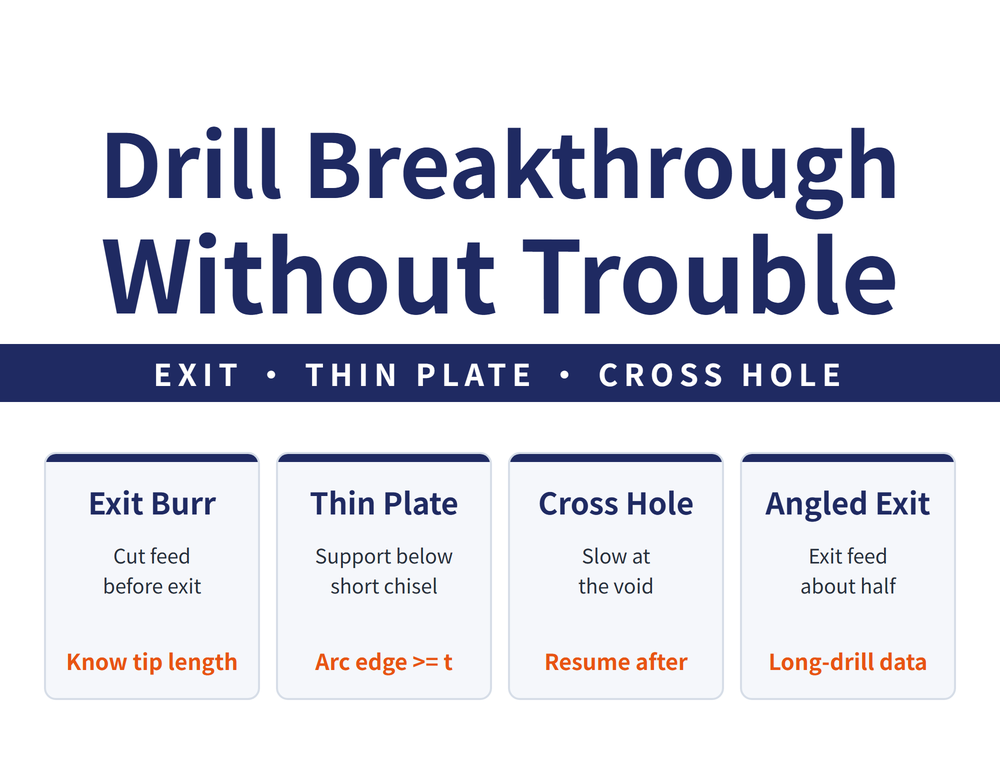
As a drill breaks through, axial resistance drops away and the actual feed jumps, which is when exit burrs, bent thin plates and chipped edges happen. The fix always points the same way: reduce the feed before the drill point reaches the exit, and restore it only after the full diameter is through. Thin plates also need support underneath and a thinned chisel edge; when the drill crosses another hole or a gap, reduce the feed on both sides of the gap.
Why breakthrough is where things go wrong
For most of the hole, the chisel edge and both main cutting edges push against the workpiece together, so axial resistance is steady. When the point exits the bottom face, the chisel edge is the first to lose support. Resistance drops in an instant, and the actual feed and cutting force suddenly increase.
Three things follow. Material is pushed out and becomes an exit burr. A thin plate has little stiffness and is bent or torn. If the exit is inclined or opens into a void, the edge cuts on one side and nothing on the other, the impact lands on the cutting edge, and it chips.
1. Three cases at a glance
| Case | What goes wrong | Do this first |
|---|---|---|
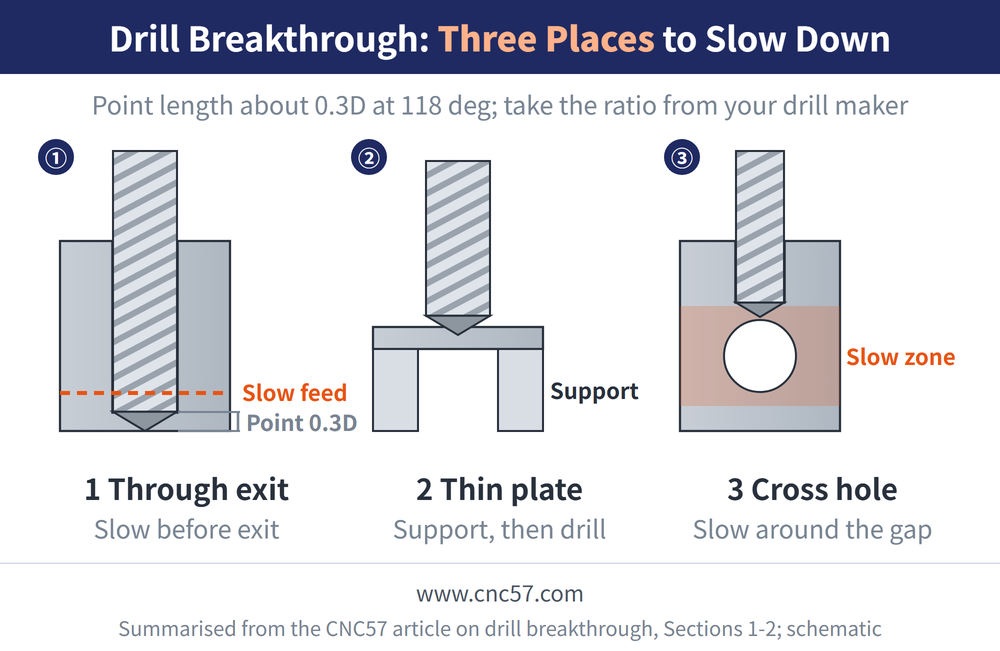
| Through-hole exit | Exit burr, breakout | Reduce feed before the point reaches the exit |
| Thin plate | Bending, tearing, irregular hole | Support underneath, then use a thin-plate point |
| Cross hole, interrupted surface | One side cuts air, the edge chips | Reduce feed before the gap, restore after |
2. Through-hole exit: where the feed reduction starts
For burrs or breakout at the exit, maker guidance gives one countermeasure: reduce the feed at breakthrough. How much differs between sources:
| Source | Feed at breakthrough |
|---|---|
| A maker's general drill-use guidance | Reduce; no ratio given |
| Same maker, long-drill procedure (inclined exit) | About half the normal feed |
| An exchangeable-head drill troubleshooting handbook | Reduce by 50-70%; see Exchangeable-Head Drill Troubleshooting |
Take the ratio from the maker of the drill you are using. The part people get wrong is the depth where the reduction starts. The point exits before the full diameter does, so the reduced feed must begin before the point reaches the bottom face and continue until the full diameter is through.
Point length ≈ (D ÷ 2) ÷ tan(point angle ÷ 2)
118° point → about 0.30D; 140° point → about 0.18D
Example: D = 10 mm, 118° point, 20 mm plate. The point exits the bottom face at 20 mm depth, and the full diameter is through at about 23 mm. Start the reduced feed before 20 mm and keep it past 23 mm.
If burrs remain after reducing the feed, the cutting edge is usually worn; see Drilling Troubleshooting Guide.
3. Thin plate: support it first, then change the point
With thin plate, the workpiece itself moves. The maker's first requirement is support under the workpiece; without it, the plate deflects under drill pressure. Once it is supported, look at the point geometry:
| Material | What the point changes | Range |
|---|---|---|
| Thin steel sheet | Chisel edge shortened to 0.75-1.5 mm; arc edge at the periphery, depth at least the sheet thickness | 0.5-2 mm thick |
| Thin pure copper sheet | Rake at the outer corner honed to 15°; arc depth set by sheet thickness | - |
| Thin aluminum sheet | Larger rake; chisel edge shortened to 0.5-1 mm | - |
| Thin phenolic (Bakelite) board | Larger rake; chisel edge 0.5-1 mm; clearance increased to 25°-30° | 0.2-2 mm thick |
| Angle and channel steel | 60° point angle; chisel edge shortened to 0.5-1 mm | Curved faces and sections |
All five share one change: a shortened chisel edge, which lowers axial resistance. How to grind these points is covered in Drill Point Types by Material and Hole; large holes in thin plate are in Section 4 of that article. If you would rather not regrind, consider a flat drill.
4. Cross holes and interrupted surfaces: slow down at the gap
When the drill reaches a hole that is already there, entering that hole is a breakthrough. If the drill has to keep going, it then re-enters the far wall after crossing the gap. Maker guidance splits this into two cases:
| Case | What to do |
|---|---|
| You can drill straight through | Reduce the feed at the interruption; restore it after the gap |
| The entry itself is interrupted or inclined | Mill the entry flat with an end mill first, then drill |
A cross-hole burr grows inside the other hole, where it is hard to reach afterwards, so it matters even more to reduce the feed before entering the gap. For how much to reduce on inclined faces, see Drilling on Inclined and Irregular Surfaces; for the full long-drill procedure with an inclined exit, see Section 6 of How to Drill Deep Holes with a Long Drill.
Frequently Asked Questions (FAQ)
Q: How do I reduce a large exit burr on a through hole?
Reduce the feed before the drill point reaches the exit and restore it once the full diameter is through. If burrs remain, the cutting edge is usually worn and should be reground or replaced.
Q: At what depth should the feed reduction start?
Before the point reaches the bottom face, continuing until the full diameter is through. The point length is about 0.3 times the diameter for a 118° point and about 0.18 times for 140°, so include it in the programmed depth.
Q: What if a thin plate keeps bending when I drill it?
Support the workpiece underneath first, then shorten the drill's chisel edge to lower axial resistance; for thin steel sheet, a point with a peripheral arc edge at least as deep as the sheet is thick can be used.
Q: How do I stop a drill chipping when it reaches a cross hole?
Reduce the feed before the drill reaches the cross hole and restore it after the gap; if the entry itself is interrupted or inclined, mill it flat with an end mill first.
Sources: reduced feed at breakthrough, support for thin plate and reduced feed at interruptions follow the Mitsubishi Materials general catalog, "Advanced use of drills" (p.1577); the long-drill inclined-exit feed follows "Advanced use of long drills" in the same catalog (p.1578).
This article is part of Drill Bits: The Complete Guide - Start From Depth-to-Diameter, Then Pick the Drill and Set the Conditions; that guide shows how the whole topic fits together.
Last updated: 2026-10-07









