
Regrinding a Broach: Start at the Finishing Teeth, and the Four Gullet Forms to Check Afterwards
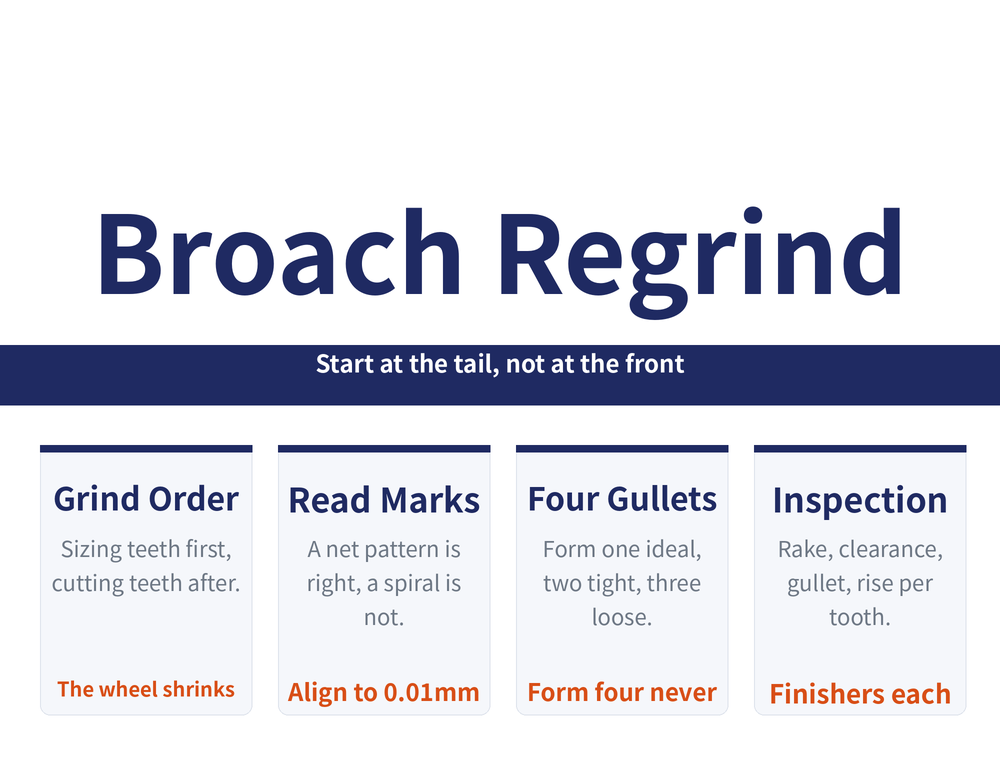
A broach is expensive and carries dozens to hundreds of teeth, so getting the regrind wrong is not like throwing away an insert. This guide covers three things: why a round broach is ground from the finishing teeth at the tail forwards, why every tooth of a surface broach's back-off face has to be measured, and the four gullet forms to look for afterwards — one of which must never appear on the roughing teeth because it breaks them.
1. Machine and holding first
Broaches are normally reground on a dedicated broach grinder such as an M6110; short ones can go on a universal tool grinder. Align the headstock and tailstock centres to within 0.02mm and judge the clamping force — too much bows the broach, which is dangerous on long slender ones, too little is not safe. Clean both centre holes and grease them before mounting.
Longer broaches want a steady rest. The locating datum is normally the front pilot's outside diameter together with the tooth gullet surfaces, concentric to within 0.05mm; the rest pads must seat properly and be oiled so friction does not heat the tool. The wheelhead tilt β follows the rake angle γ being ground.
2. Round broaches: read the marks, then grind from the tail
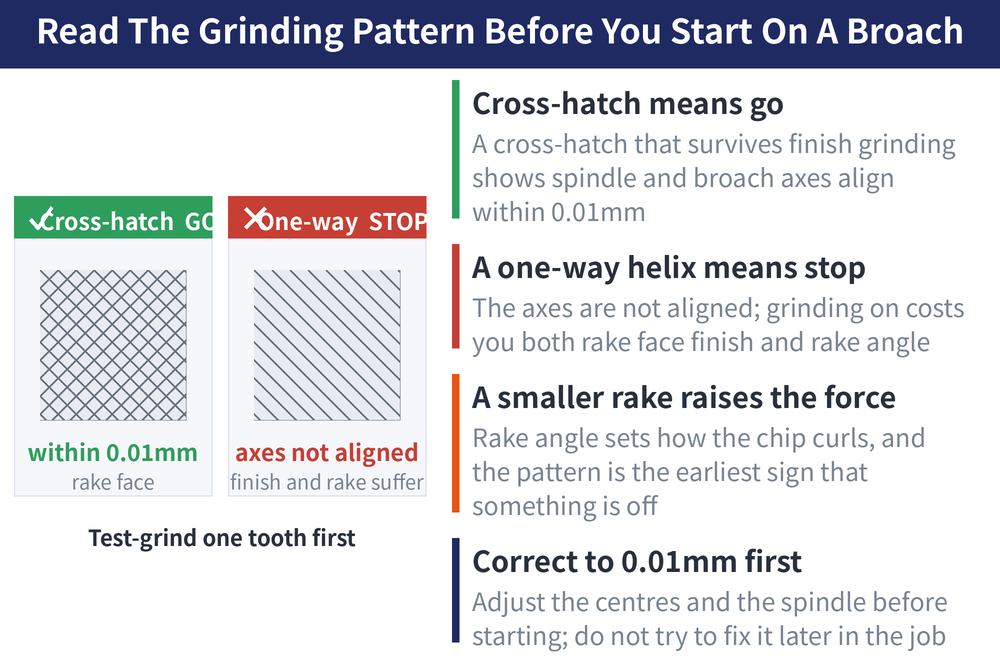
The first job is to grind one rake face as a trial and look at the pattern. A net-like pattern that stays net-like after finishing means the wheelhead spindle and the broach axis agree to within 0.01mm — go ahead. A one-way spiral pattern means they do not, and pressing on costs you twice: the rake face finish gets worse and the rake angle shrinks.
The order is from the sizing teeth at the tail, tooth by tooth towards the cutting teeth. The sizing teeth are the largest in diameter and are allowed a slightly smaller rake than the roughing teeth; because the wheel shrinks as it wears, this direction actually holds the rake angle γ steadier across the tool. The sizing teeth can also be stepped back: grind only the first one this time, the first and second next time, and so on, which cuts how often they are ground, slows the loss of diameter and extends broach life.
Feed from top to bottom and left to right until all the wear is gone, then dwell a few seconds at the end of feed to let the wheel polish the rake face. Withdraw parallel from right to left for a short distance first, then lift away quickly — pulling straight up nicks the edge. Watch the h dimension throughout; it sets the rake angle and how tightly the chip curls.
3. Surface broaches: every tooth gets measured
A surface broach normally sits on a magnetic chuck, dialled parallel to the table's longitudinal ways before being clamped. The wheelhead tilt β takes two values: on the rake face it equals the rake angle γ, on the back-off face it equals the clearance angle α.
The back-off face is the awkward one, because it sets the rise per tooth directly. The source has the operator measure with a micrometer after every single tooth, and even then does not guarantee all of them come out right. Its alternative is segmented inclined-plane grinding: the rise per tooth comes from the incline and the tooth pitch, then the back-off face is ground to form the clearance angle, leaving a land of set width on each tooth (generally no more than 0.05mm on roughing teeth). That way nothing is measured tooth by tooth; you only hold the land width.
4. Inspection: the four gullet forms
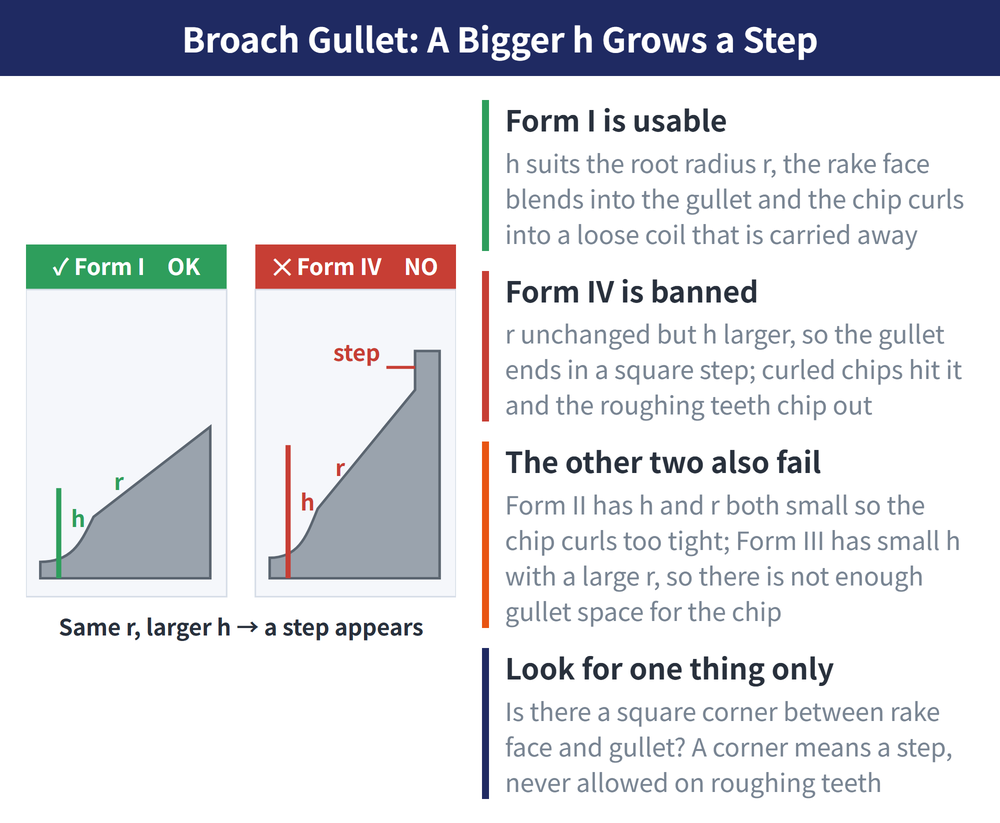
A reground broach is self-checked by the grinder and re-checked by an inspector before it goes back on the machine, precisely to avoid broken or stripped teeth. Gullet form is the critical check, and the source gives four:
| Form | What it looks like | Consequence |
|---|---|---|
| I (ideal) | h and root radius both to drawing, rake face blends into the root | Chip curls into a loose helix |
| II | h reduced, radius reduced with it, a step in the rake face | Curl too tight; roughing teeth chip |
| III | h reduced but the root radius grown | Curl too loose; not enough chip space |
| IV (forbidden) | h enlarged, radius unchanged, a step at the root | The curled chip hits the step; roughing teeth break |
Check the form against a dedicated template and the root radius with a radius gauge under a magnifier.
5. Rise per tooth and clearance: what to measure and how often
Rise per tooth splits into two tiers. Finishing-tooth rise and sizing-tooth diameter matter most to the workpiece, so measure every tooth. Roughing-tooth rise affects broaching force and vibration, so sampling will do — say every fifth or sixth tooth. Clearance can be taken with a universal protractor, a dial indicator (tanα=Δh/L) or a sine bar (H=sinα×L). Grinding the back-off face with the wheel periphery wears the grit away and leaves the clearance small, so sample more teeth; ground on the wheel face, clearance is set by β and fewer will do.
For inspection after regrinding other tools, compare Regrinding Reamers and Which Wheel Grinds Which Tool.
6. Last step: do not leave the burr on the tool
Grinding leaves feathering and burrs on the tooth edges, and putting that straight to work scores the bore early in the cut and leaves small nicks in the edge. The source's fix is crude and effective — keep the broach turning and run a cast-iron plate or a fine stone of 400 grit or finer along the tooth diameters, pushing gently from the sizing teeth towards the roughing teeth. A brass brush also works.
7. Frequently Asked Questions (FAQ)
Q: Why not start at the first cutting tooth?
Because the wheel shrinks as it grinds. Starting at the largest-diameter sizing teeth and working towards the cutting teeth means the wheel is at its largest on the end with the loosest requirement, and the rake angle comes out more consistent along the tool. Go the other way and the wheel has already shrunk by the time you reach the teeth that matter.
Q: One-way spiral marks — must I stop?
Yes. It means the wheelhead spindle and the broach axis are not aligned, and carrying on costs two things at once: a worse rake face finish and a rake angle ground smaller than intended. A smaller rake changes how the chip curls and pushes the broaching force up. Bring the alignment back inside 0.01mm before you grind.
Q: What if a few teeth are badly worn?
Mark them with dye before grinding, take a little extra off those teeth, and take a little extra off the few teeth either side as well so the rise per tooth stays evenly progressive. Broaching depends on equal chip thickness per tooth; fixing one tooth alone leaves a step there and the cut stops running smoothly.
Q: Spherical arc grinding versus the straight cone method?
The old straight-cone method needs a small-diameter wheel to limit interference, which leaves a coarser rake face and hurts broaching quality; its merit is simplicity, and it is still in use. Spherical arc grinding cuts the interference between the wheel edge and the rake face, and the face it produces is part of a large internal sphere — an arc in axial section — so the edge comes out sharp and curls chips well. It is the widely adopted method today.
This article is part of Tool Regrinding: The Complete Guide — Decide Whether to Grind, Then Look Up How, With What, and How to Check; that guide shows how the whole topic fits together.
Published: 2026-08-18|Last updated: 2026-08-18









