
Chatter is the biggest fear in long-overhang milling and boring - once it starts, it tends to self-amplify, leaving surface waviness, chipped edges, and shorter tool life. This guide explains what causes chatter (self-excited vibration), how the dynamic vibration absorber (DVA) inside anti-vibration holders is tuned, key setup practices, and how insert geometry helps reduce vibration at the source.
1. What Chatter Is - A Self-Reinforcing Loop
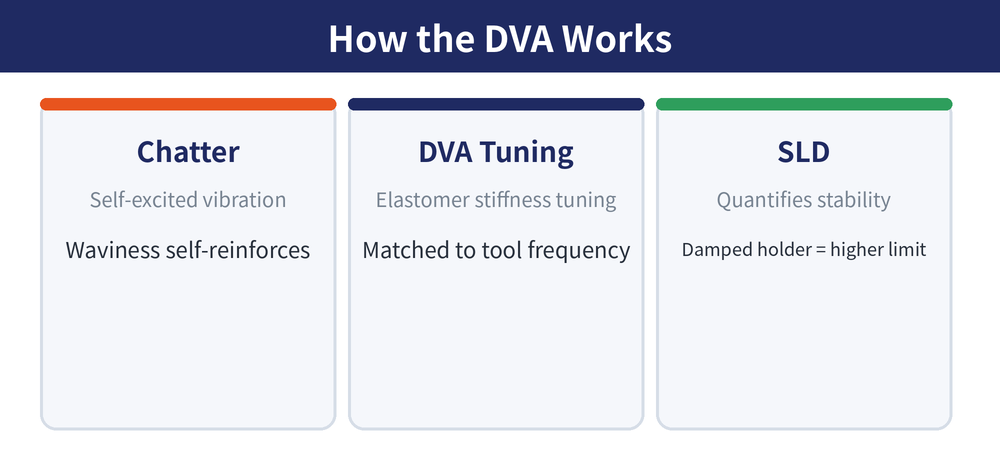
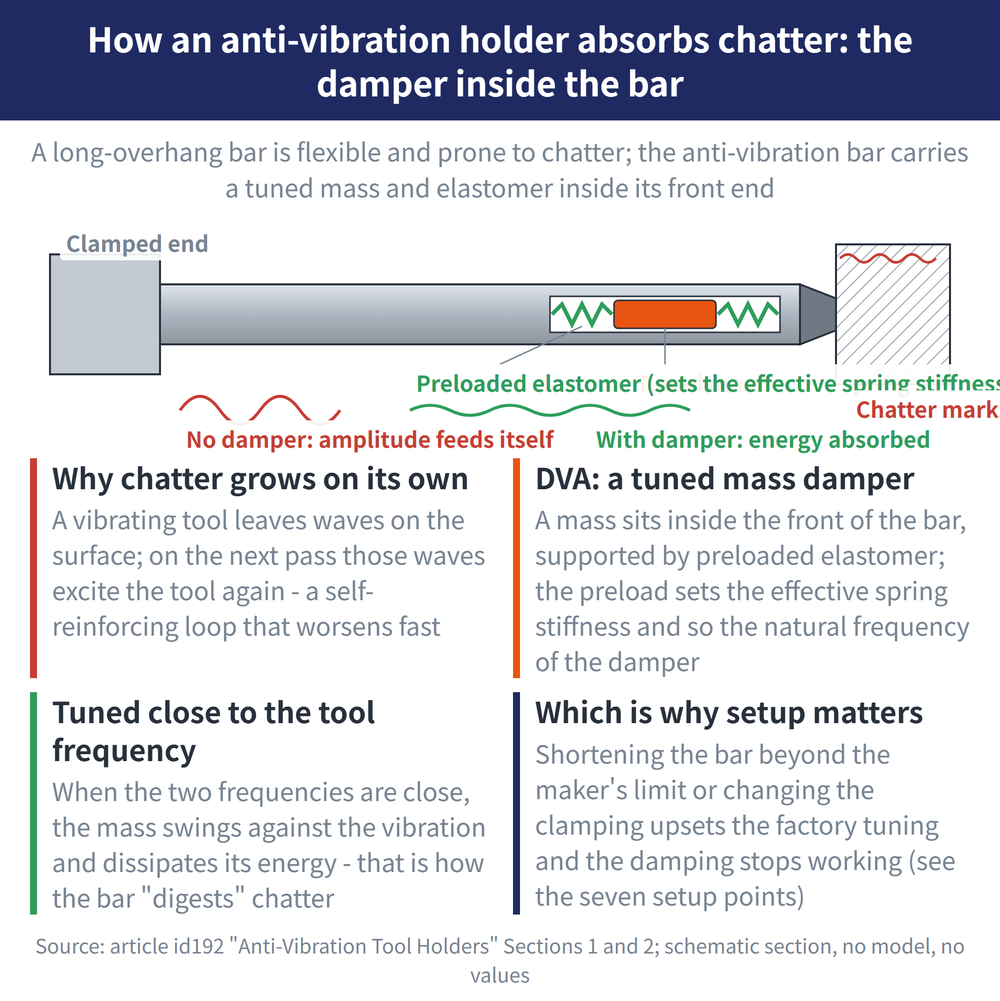
The most familiar form of tool vibration is self-excited vibration, commonly called chatter. A vibrating tool leaves waviness on the workpiece surface, and that waviness becomes a new excitation source on the next pass, creating a self-reinforcing loop - which is why chatter escalates quickly once it starts rather than fading away. In long-overhang milling and boring the holder extends further and is inherently less rigid, making them high-risk conditions for chatter.
Boring bars and chatter: see Boring Bar Guide.
2. How Anti-Vibration Holders Absorb Vibration - the DVA Principle
Anti-vibration holders contain a preloaded elastomer mechanism used to tune the effective spring stiffness. That stiffness shifts the DVA system's natural frequency, and the system is tuned so the DVA's natural frequency is close to the tool's own natural frequency - when the two are matched, the DVA absorbs and dissipates vibration energy, a classic tuned mass damper application.
The industry uses a Stability Limit Diagram (SLD) to turn the qualitative sense that "this holder chatters less" into a comparable quantitative metric: by increasing tool damping and lowering the peak amplitude of the frequency response function (FRF), an anti-vibration holder's stability limit is typically noticeably higher than a comparable conventional holder.
Balance at high rpm: see Tool Holder Balance Grade (G Value).
3. Seven Setup Points (Part 1) - Sizing, Clamping and Inverted Mounting
Buying an anti-vibration holder doesn't guarantee it works; performance depends heavily on setup. The first four points cover sizing and clamping:
| Point | Notes |
|---|---|
| Holder sizing | The holder's minimum diameter parameter should generally be 10%-20% smaller than the bore being machined, to leave room for chip clearance and deflection |
| Clamping rigidity | A flat-bed tool post typically offers more rigidity than turret clamping; with large-diameter holders the self-weight moment increases significantly, so the impact of clamping rigidity is amplified |
| Mounting upside down | In some setups, mounting the holder upside down lets its self-weight moment oppose the clamping system's load direction, reducing the moment load on the turret |
| Clamping method | Choose a clamping method that applies force evenly around the holder's circumference (e.g. a split sleeve) rather than a single-point screw |
4. Seven Setup Points (Part 2) - Zero Setting, Shortening Limit and Overhang Baseline
The remaining three points decide whether the damping mechanism keeps its factory tuning:
| Point | Notes |
|---|---|
| Zero setting | Follow the manufacturer's procedure for tool zero-setting during installation - a standard step for anti-vibration holders |
| Shortening limit | If the holder needs shortening, always check the marked minimum length limit - shortening past it can disrupt the tuning of the internal damping mechanism |
| Overhang baseline | Anti-vibration performance is typically pre-calibrated at a specific overhang (a common industry baseline is around 100mm); the further you deviate, the less reliable the pre-calibration becomes |
The shortening limit is the biggest operational difference between an anti-vibration holder and a solid one: shortening a solid holder only affects rigidity, while shortening an anti-vibration holder past its limit can disrupt the internal tuned frequency and disable the damping effect - easy to overlook when cutting a holder down to length on the shop floor.
Runout, measured and reduced: see Tool Runout: Effects and Control.
5. Insert Geometry: The First Line of Defense Against Vibration
Vibration suppression doesn't rely on the holder mechanism alone - insert geometry is equally critical to successful chatter control:
| Principle | Effect |
|---|---|
| Use an overall positive-rake geometry insert | Reduces cutting force - the lower the cutting force, the less vibration energy needs to be absorbed |
| Use a positive rake face | Further reduces cutting resistance |
| Use a small edge hone | Usually achieved by grinding the insert or choosing a thin-coated insert; reduces the edge's contribution to cutting force |
These three principles serve the same goal: reduce cutting force by every means available. The DVA deals with vibration that has already occurred, while insert geometry addresses its root cause - the two are complementary, not interchangeable, and an expensive holder paired with the wrong insert geometry will still undercut the result. Maintaining a constant spindle speed is also a key factor for stable, controllable cutting - speed fluctuation is a major variable affecting vibration.
FAQ
Q1: Can I cut an anti-vibration holder down to any length?
Not recommended without checking first. Anti-vibration holders contain a tuned internal damping mechanism (such as a preloaded elastomer), and the holder is usually marked with a minimum length it can be shortened to. Cutting past that limit can disrupt the internal tuned frequency and disable the damping effect - you'd end up with an anti-vibration holder that no longer damps. Always check the manufacturer's marked limit before cutting.
Q2: Why does chatter still occur even with an anti-vibration holder?
Common causes include insufficient clamping rigidity (e.g. using turret clamping for a large-diameter holder without accounting for the moment load), a holder that's been shortened past its tuning limit, wrong insert geometry (insufficient positive rake or too large an edge hone, driving up cutting force), or unstable spindle speed. An anti-vibration holder is an aid, not a substitute for correct clamping and insert selection. See Before the Coating: How Edge Preparation Affects Adhesion and Tool Life for details.
Q3: Are anti-vibration holders only for boring?
Most commercially available anti-vibration tooling targets internal (boring) operations, since long overhang and inherently lower rigidity make boring a high-risk condition for chatter. Some manufacturers do offer anti-vibration blades for external turning as well, so confirm the product supports your actual operation (internal or external) before selecting.
Q4: How do I tell if I'm actually dealing with chatter?
Typical signs of chatter are regular waviness on the machined surface and a noticeably louder, sharper machining noise, with the waviness usually growing progressively along the tool path rather than staying constant. If you see this kind of waviness together with a long tool overhang, it's more likely chatter than simple tool wear or a feed rate issue.









