
Regrinding a Reamer: Rake Face, Flank and How Fine the Ground Surface Must Be
A reamer is the last tool that makes a hole right, so how accurately the reamer itself is ground decides the tolerance and the finish of the hole. This guide walks the real sequence on a universal tool grinder: which wheel for the rake face, how the offset H is calculated, how far the tooth rest drops for the flank, what up-grinding and down-grinding trade against each other, and the numbers for how fine the ground surface should be.
1. Before you start: sequence and workholding
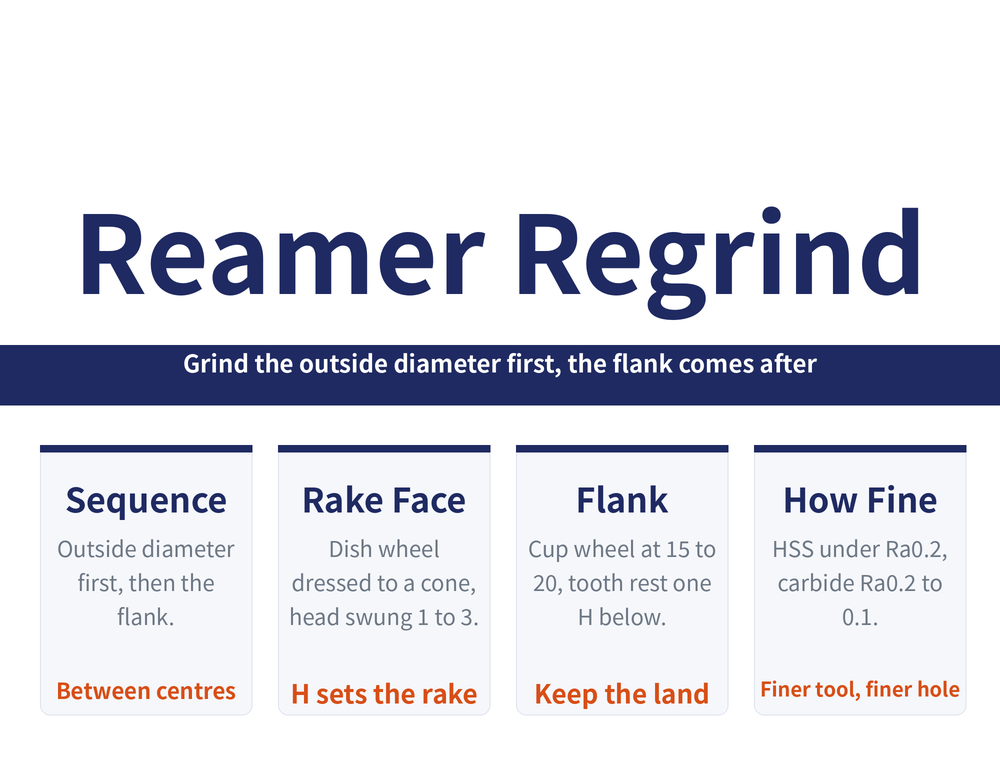
Reamer regrinding is done on a universal tool grinder, and the rake face and the flank do not use the same wheel. The order cannot be swapped either.
| Item | Rake face | Flank |
|---|---|---|
| Wheel | Flat side of a dish wheel | Cup wheel |
| Dressing | Internal cone, high at the rim, low at the centre | Internal cone sloping 15°~20° toward the centre |
| Wheelhead angle | Swung 1°~3° | Wheel face 1°~3° to the reamer axis |
| Prerequisite | — | Sizing and cutting portions ground on the outside first |
Both operations hold the reamer between centres, with the pressure set sensibly — too loose and the tool runs out, too tight and a slender reamer bows. The reason the wheelhead is swung that 1°~3° is to let only one edge of the wheel touch the tool face: a small contact patch is what stops the teeth burning. For where reaming sits in the whole hole-making route, see How to Improve Hole Accuracy; for choosing the reamer type, flute count and angles in the first place, see Choosing a Reamer: Seven Classification Axes, 15 Types, Flutes and Angles.
2. Rake face: the offset H is the rake angle
With the wheel dressed and the head swung, bring the wheel into the flute and set it on centre. That setting position is the rake angle itself:
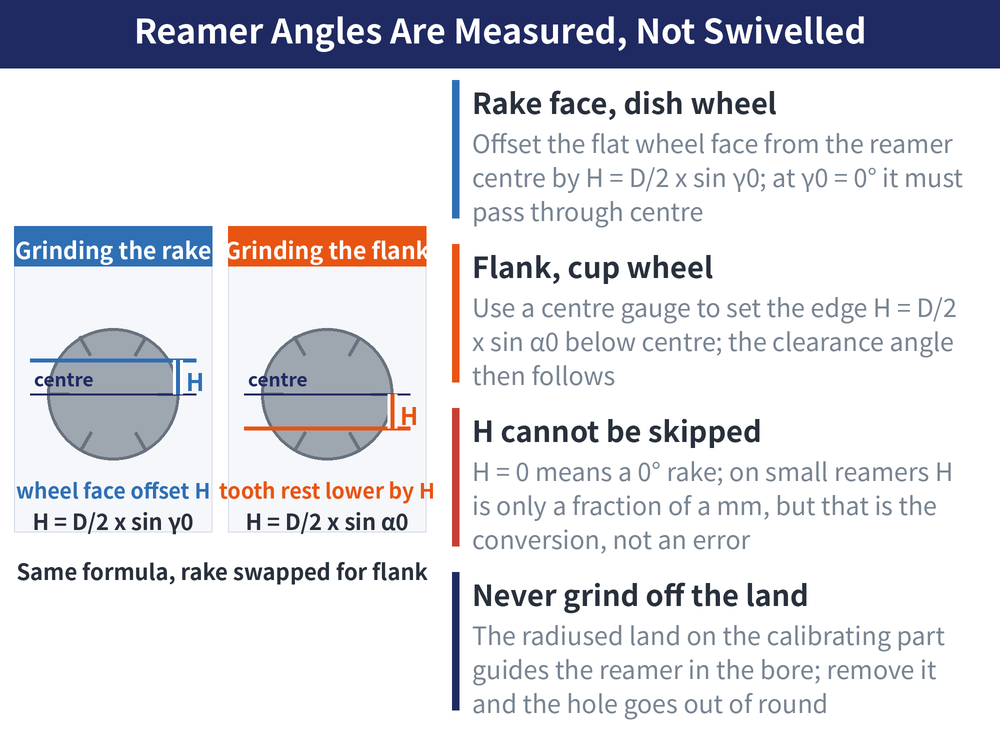
Rake γ0 = 0°: the flat face of the dish wheel must pass through the reamer centre.
Rake γ0 > 0°: the flat face is offset from the centre by H = D/2 × sinγ0, where D is the reamer diameter.
Start the wheel only after checking everything. Steady the reamer by hand so the rake face rides the wheel face, feed the table longitudinally, and keep the pressure even and moderate so the teeth do not burn. Finish one tooth, then index to the next, until every tooth is done.
One detail costs people tools: ease off the pressure as the wheel reaches either end of the reamer, and never let the wheel run off the end — run off and you round the corner away, and a collapsed end destroys the lead into the hole. For a finishing pass, use a fine grit (180#) medium-soft (K, L) aluminium oxide wheel; if no dish wheel is available, a straight wheel dressed to an internal cone will substitute. For reading wheel markings, see Reading a Grinding Wheel Marking.
3. Flank: drop the tooth rest by one H
Flank clearance is not produced by swinging an angle — it is produced by setting the cutting edge low. Use a centre gauge to set the tooth rest blade so the edge being ground sits one H below the reamer centre:
H = D/2 × sinα0, where α0 is the clearance angle wanted. Same family as the rake formula, with the rake angle swapped for the clearance angle.
The order is sizing portion first, cutting taper second. On the sizing portion, hold the tooth's rake face firm against the top of the tooth rest, feed longitudinally tooth by tooth, and take one cross feed after each tooth. The teeth of the sizing portion must keep a circular land: that land is what guides the reamer inside the hole, and grinding it away costs you roundness. Then swing the table and grind the flank on the cutting taper — its clearance is slightly greater than the sizing portion, so the tooth rest drops a little further. Afterwards the flank and the circular land can be lapped once more, which improves the reamed finish.
For how to measure the clearance after grinding, and how to check diameter and runout, see Inspecting a Tool After Regrinding: Three Ways to Check a Turning Tool and Four Checks for a Reamer.
4. Up-grinding or down-grinding: safety against quality
| Wheel direction | Effect on the tooth | Trade-off |
|---|---|---|
| Rotation holding the tooth down | Presses the rake face onto the tooth rest | Safer and faster, but the edge tends to turn over and to draw its temper |
| Rotation lifting the tooth | Tends to lift the rake face off the tooth rest | Better quality, no burn or turned edge, but a loose grip lets the reamer spin: a scrapped part at best, an accident at worst |
Neither is simply right. The question is what you protect first: run it holding down for output and safety, lifting for quality when your hand is steady.
5. How fine the ground surface must be
Reamed surface finish depends on edge quality, cutting data, cutting fluid and workpiece material. But once the data and the fluid are sensibly chosen, the finish of the hole is governed by the finish of the reamer's own cutting edges — the tool is as fine as the hole gets.
Trials at a car plant, reaming aluminium alloy, cast steel and grey iron parts, showed that improving the finish of the reamer's guide lands, flanks and rake faces raised the surface quality of the hole and lengthened reamer life at the same time. These two are not a trade-off.
| Reamer material | Recommended finish on the cutting portion |
|---|---|
| High speed steel | Below Ra0.2μm |
| Carbide | Ra0.2~0.1μm |
The material-by-material table of reaming speeds and feeds has a doubtful speed unit (read as printed, the speeds come out far beyond what a high speed steel reamer can take, and setting a machine by the wrong unit will wreck the tool) and an unreadable range in the magnesium alloy row, so it is not reproduced here rather than risk publishing wrong data. Take reaming data from the tool catalogue and your own trial cuts; for the arithmetic see Machining Formulas Cheat Sheet.
6. Frequently Asked Questions (FAQ)
Q: Why must the outside diameter be ground before the flank?
Because clearance is set by how far the edge sits below centre, and that reference is the reamer's outside diameter. Grinding the flank against a diameter that has not been finished means measuring an angle from a moving datum, and every clearance ends up wrong.
Q: The offset H works out tiny — can it be ignored?
No. H = D/2 × sinγ0 is the definition of the rake angle, so setting H to zero grinds the rake to 0°. On small reamers H really is a few tenths of a millimetre, but that is the angle converted to a length, not a rounding error.
Q: Can the circular land on the sizing portion be ground off?
No. That land is what guides the reamer in the hole and it governs roundness and straightness. Keep it deliberately while grinding the flank, and lap it afterwards to make it finer still.
Q: Does a finer ground surface shorten tool life?
The opposite. In the car plant trials, improving the finish of the guide lands, flanks and rake faces raised hole quality and reamer life together. Aim below Ra0.2μm on high speed steel reamers and Ra0.2~0.1μm on carbide.
This article is part of Tool Regrinding: The Complete Guide — Decide Whether to Grind, Then Look Up How, With What, and How to Check; that guide shows how the whole topic fits together.
Published: 2026-08-18|Last updated: 2026-10-22









