
Boring Troubleshooting: Vibration, Chips, Feed Marks and Power
When boring goes wrong, nine times out of ten it comes down to vibration, chips and power. This guide organises the manufacturer's boring troubleshooting into tables: how to tune the six vibration factors, how to fix chips too short and hard or too long, how to chase feed marks, and which parameter to move first when power is limited. The easiest one to get backwards is depth of cut — roughing and finishing call for opposite adjustments under vibration.
1. Sort boring faults into three classes first
Sort the symptom into three classes before acting: vibration (tool vibration, feed marks), chips (too short and hard, too long, scoring the surface) and power (limited machine power). Insert wear forms and remedies in boring are very similar to turning, so wear diagnosis can borrow directly from turning logic; this guide focuses on the vibration, chips and power specific to boring.
2. The six factors of the vibration tendency and their countermeasures
The manufacturer lists six factors that influence the vibration tendency, each with a move that shifts vibration in a favourable direction:
| Factor | Direction of countermeasure |
|---|---|
| Entering angle | Check the workpiece clamping |
| Lead angle | Check the machine spindle, wear and clamping |
| Nose radius | Use a smaller nose radius |
| Micro and macro geometry | Choose a light-cutting geometry and grade |
| Cutting edge | Lower the cutting speed; use stepped boring; lower or raise the feed |
| Depth of cut (DOC) | Increase depth in finishing, reduce depth in roughing (opposite directions) |
General countermeasures: use the largest possible tool diameter, choose a two-edge rough boring tool, use the shortest possible overhang, switch to a dampened tool for long overhang, and confirm every unit of the assembly is torqued correctly. For the full overhang and damping principles, see fine boring and tool overhang: single-edge tools and five principles.
3. Depth of cut: opposite directions for finishing and roughing
The most misused row above is depth of cut. In finishing, vibration calls for more depth; in roughing, vibration calls for less depth — completely opposite. If a finishing pass cuts too shallow, the insert skates on the already-machined surface, scoring the wall, accelerating wear and inviting vibration; adding a little depth to make the insert "bite" is steadier. That is the opposite of the instinct that "finishing means cutting shallower" and is the one line to remember here.
4. Chip problems: too short and hard versus too long, opposite fixes
When chips go wrong, the direction matters too:
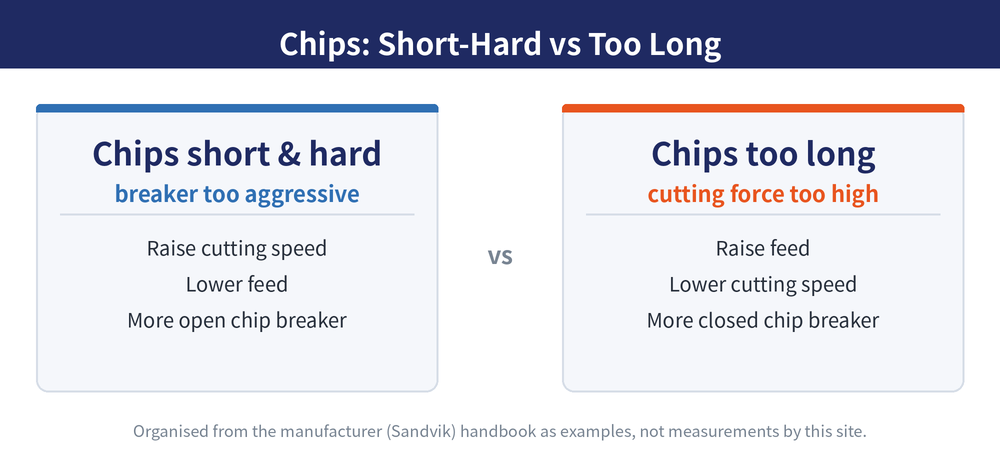
| Symptom | Cause | Direction of fix |
|---|---|---|
| Chips too short and hard | Feed too high, speed too high, depth too large | Raise cutting speed, lower feed, change to a more open chip breaker |
| Chips too long | Cutting force too high | Raise feed, lower cutting speed, change to a more closed chip breaker |
Note that the first fix for "chips too short and hard" is actually to raise cutting speed, against instinct: short, hard chips mean the chip breaker is too aggressive for the current conditions, so raising speed changes the chip flow and, with a geometry change, restores balance — rather than turning every parameter down.
5. Feed marks and surface finish
When the wall shows feed marks or the finish worsens, handle it by cause:
| Symptom | Cause | Direction of fix |
|---|---|---|
| Feed marks | Cutting force too high | Reduce depth, use a positive-rake insert, use a smaller nose radius |
| Feed marks (other cause) | Feed too high | Choose a Wiper insert, use a larger nose radius, lower the feed |
| Chips scoring the surface | Wrong cutting parameters | Change the cutting edge; investigate the cause of the wear form (parameters, geometry, grade) |
Wall finish only counts when you can measure it accurately; for the Ra range each process reaches, see the process-versus-surface-roughness chart: Ra ranges for turning, grinding and polishing.
6. What to adjust when machine power is limited
When a poor finish or rough running comes from insufficient power, the order is: lower cutting parameters, use stepped boring, reduce the number of engaged inserts, reduce depth of cut; if needed, raise speed, add coolant and switch to a cermet grade. In rough boring, the four parameters that most drive power and torque consumption are feed, number of inserts, diameter and depth of cut — so look there first when power is short. For rough boring edge count and selection, see rough boring tool selection: edges, rake and entering angle.
These countermeasures are organised from the manufacturer (Sandvik) handbook boring troubleshooting section as general direction, not measurements by this site; actual adjustment amounts and parameters follow each brand's catalogue and trial cuts.
Last updated: 2026-07-26
7. Frequently Asked Questions (FAQ)
Q: Boring keeps vibrating — where do I start?
Start with the rigidity side: use the largest possible tool diameter and the shortest possible overhang, switch to a dampened tool for long overhang, and confirm the assembly is torqued correctly. On the parameter side, lower the cutting speed, use stepped boring, adjust the feed, and use a smaller nose radius with a light-cutting geometry; among the six vibration factors, note that depth of cut goes in opposite directions for finishing and roughing.
Q: Why increase depth of cut when a finishing pass vibrates?
Because if a finishing pass cuts too shallow, the insert skates on the already-machined surface, scoring the wall, accelerating wear and inviting vibration; adding a little depth so the insert bites the material is steadier. This is the opposite of roughing — in roughing, vibration calls for less depth to cut the load.
Q: Chips are too short and hard — why raise the cutting speed?
Short, hard chips mean the chip breaker is too aggressive for the current conditions; raising the speed a little changes the chip flow and, with a more open breaker and lower feed, brings chip breaking back to balance rather than turning every parameter down. Chips too long are the opposite: from too high a cutting force, fixed by higher feed, lower speed and a more closed breaker.
Q: When machine power is limited, which parameter should I move first?
The order is: lower cutting parameters, use stepped boring, reduce the number of engaged inserts, reduce depth of cut; then if needed raise speed, add coolant and switch to a cermet grade. In rough boring the four parameters that most drive power and torque are feed, number of inserts, diameter and depth of cut, so look there first.
For the full reading guides on this topic, see Surface Finish: A Complete Reading Guide, Insert Selection: A Complete Reading Guide and Vibration and Chatter: A Complete Reading Guide.









