
Face Milling Troubleshooting: Symptoms, Causes and Fixes
When face milling goes wrong, nine times out of ten it is one of a handful of problems: chipping, chatter, poor surface finish, burrs, built-up edge, or short tool life. This guide organises the common faults into one symptom → cause → fix table you can look up and act on directly.
1. The Three Root Causes of Face Milling Faults: Force, Heat, Vibration
The many symptoms of face milling look scattered but mostly trace back to three roots: force, heat and vibration. Decide which one first, then the table below narrows the search fast.
| Root | Core variables | Typical symptoms |
|---|---|---|
| Force | Cutting force, engagement (entry impact, engagement angle) | Chipping, burrs |
| Heat | Cutting heat, cooling method | Built-up edge, short tool life |
| Vibration | System rigidity, overhang, pitch, resonance | Chatter, poor finish, feed marks |
How to use it: first ask "is this symptom mostly force, heat or vibration?" A sudden corner missing from an insert is usually force (impact); a regular repeating pattern on the wall is usually vibration (chatter); smearing and discolouration is usually heat.
2. The Face Milling Fault Reference Table
This is the core of the guide. Look up the symptom on the left for the common causes and the direction of the fix; a single symptom often has several causes, so work down the row in order.
| Symptom | Common causes | Direction of the fix |
|---|---|---|
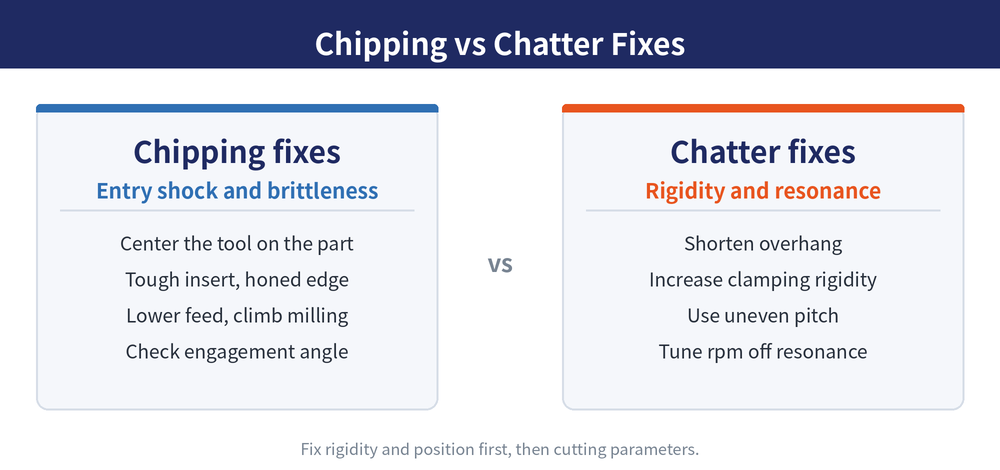
| Insert chipping | High entry impact, insert too brittle, wrong engagement angle | Adjust tool position (centre the cutter over the workpiece), use a tougher insert, reduce feed, use climb milling |
| Chatter / vibration | Excessive overhang, insufficient rigidity, wrong pitch | Shorten overhang, raise rigidity, switch to a differential-pitch cutter, adjust speed to avoid resonance |
| Poor finish / feed marks | Insufficient wiper, high runout, feed too high | Add a wiper insert, reduce runout, reduce feed per revolution |
| Burr (exit) | Insufficient exit support, dull edge | Adjust the exit angle, fit a sharp insert, reduce feed on the exit pass |
| Built-up edge | Cutting speed too low, material sticks to the edge | Raise cutting speed, use a sharp positive-rake edge, apply suitable cooling |
| Short tool life | Cutting speed too high, insufficient cooling, material too hard | Lower speed, improve cooling, match insert grade and geometry to the workpiece material |
The table above is a directional troubleshooting reference, not fixed parameters; actual cutting speed and feed values are typical, subject to the catalogue or standard, and to be confirmed by a trial cut.
3. One Often-Overlooked Key: Tool Position Relative to the Workpiece and the Entry / Exit Angle
With the same cutter and the same insert, chipping and finish change completely depending only on where the tool sits relative to the workpiece (in the climb-milling zone or on the centre line). The entry and exit angle set the direction and thickness of the impact the instant the insert meets the workpiece, driving both chipping and exit burr directly.
Offsetting the cutter centre slightly toward the workpiece so the insert enters where the chip is thinner (a climb-milling layout) moves the entry impact off the cutting tip and lowers the chance of chipping. For tool selection and angle detail, see the Face Milling Tool Selection Guide and Face Milling Tool Geometry Explained; for finish control, see Face Milling Surface Finish Control; for the chatter mechanism, see What Is Milling Chatter; and for where each method fits, see the Milling Methods Overview.
This guide gives direction only, not specific cutting-condition numbers; for calculating speed, feed and depth of cut, go to the End Mill Cutting Conditions Guide and confirm against the workpiece material and the actual machine.
Last updated: 2026-07-26
4. Frequently Asked Questions (FAQ)
Q: How do I diagnose persistent chipping in face milling?
Start with the "force" group: check whether the cutter is centred over the workpiece and whether you are climb milling, then whether the insert is tough enough and the feed too high. Most chipping comes from entry impact landing on the cutting tip, so adjusting position and lowering feed is the most direct fix.
Q: For chatter, do I adjust speed or shorten overhang first?
Shorten overhang and raise rigidity first — that treats the cause; adjusting speed to dodge resonance is the quick stop-gap. Use both, but if overhang is excessive, changing speed alone usually will not hold it down.
Q: How do I remove feed marks from the surface?
Add a wiper insert, reduce cutter runout, and lower feed per revolution so the wiper has enough overlap. When runout is large, lowering feed alone does little — correct the runout first.
Q: How do I reduce exit burrs?
Adjust the exit angle, fit a sharp insert, and lower feed as the cut nears the exit so material is cut rather than pushed out. Where exit support is poor, adding a backing or changing the path direction also helps.
For the full reading guides on this topic, see Tool Life and Wear: A Complete Reading Guide, Insert Selection: A Complete Reading Guide and Vibration and Chatter: A Complete Reading Guide.









