
End Mills: The Complete Guide - Know the Cutter, Choose It, Set the Conditions; Toolpaths Are Another Line
Milling splits into two halves. One is what the cutter is, which one to buy and what conditions to run; the other is how the cutter moves. The first is decided by the people reading catalogues and buying tools, the second by the person writing the program, and the criteria are not the same. These 20 articles cover only the first half - from knowing the cutter, through selection, the numbers you have to calculate, diagnosis, and finally whether to regrind or replace. The toolpath half has a line of its own.
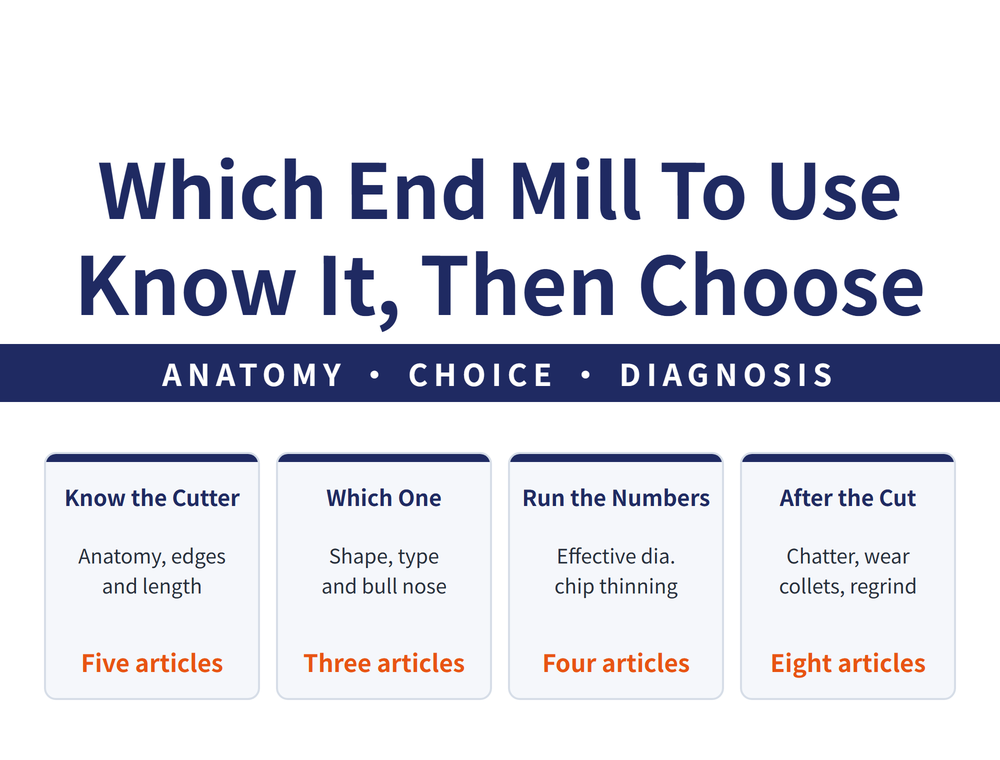
1. Two Halves, and This Line Covers One of Them
The same milling problem can be solved at the cutter or at the toolpath. But the criteria - and the person deciding - differ:
| What this layer asks | What it judges on | Where |
|---|---|---|
| What the cutter is | Anatomy, edge form, flute count, length | Section 2 (5) |
| Which one, and what conditions | Operation, material, effective diameter | Sections 3-4 (7) |
| How the cutter moves | Widths, depths, entry, scallop height | Another line |
The third row is deliberately left out: toolpath is decided by whoever writes the program, on a different set of criteria. That half is Milling Toolpaths: A Complete Reading Guide. The two lines meet only where one problem has two possible fixes.
2. Know the Cutter: Anatomy, Edge Form and Length
These five are the groundwork for reading a catalogue. Between two end mills of the same size, the difference is almost always hidden in these terms.
| Article | When to read it |
|---|---|
| End Mill Parts Explained | The entry point. Get the names straight first |
| Types and Features | To see how the shapes actually differ |
| Edge Form: Sharp or Deep Flute | Trading sharpness against durability |
| Variable Pitch and Variable Helix | The catalogue says both and you want the difference |
| Length and Deflection | When deciding how far to stick it out |
The last one is the most useful here: double the overhang and the deflection does not merely double. That relationship decides whether one pass is possible, and it is not printed in any catalogue.
3. Which Cutter: By Operation
Selecting is not about finding the best cutter. It is about finding the one that matches this operation.
| Article | When to read it |
|---|---|
| Cutter Types by Operation | Two flutes or four, and how much helix |
| Selecting by Cut Geometry | Read this first. Faces, walls, slots, corners |
| Cutters for High-Speed Roughing | Roughing, and unsure which form to use |
Substrate and coating are a separate dimension and not part of this section - that line is Tool Materials and Coatings: The Complete Guide. Settle the cutter form first, the grade second; reversed, the list never narrows.
4. Setting Conditions, and the Two Numbers You Must Calculate
Conditions are not just a table lookup. Two things go wrong if you skip the arithmetic: the diameter actually cutting, and the feed to add back once the chip thins.
| Article | When to read it |
|---|---|
| End Mill Cutting Conditions | Read this first. The calculation entry point |
| Effective Diameter | Shallow cuts with a ball or bull nose |
| Chip Thinning and Feed Compensation | Narrow radial cuts, feed left too low |
| Conditions and Surface Finish | Which parameter moves which result |
The middle two are the ones people skip, and they are exactly why "the table said so" can still give poor productivity: a ball nose taking a shallow cut runs far below the speed its nominal diameter suggests, and at a narrow radial width each tooth actually removes less than the setting says.
5. Diagnosing Trouble
Milling trouble can sit in the cutter, in the holding, or in the conditions. Establish which class it is before changing anything.
| Article | When to read it |
|---|---|
| End Mill Troubleshooting | Read this first. Symptoms mapped to causes |
| Failure Causes and Fixes | For the whole catalogue of failure modes |
| End Mill Wear Analysis | Telling wear apart from chipping |
| What Milling Chatter Is | It sings, and the surface is regularly marked |
| Collet Damage and Deformation | The tool pulls out, or runout will not come down |
The last one carries an easily missed point: the problem may not be in the cutter at all. For the holding end, see Tool Holders: The Complete Guide; for chatter in depth, Vibration and Chatter: A Complete Reading Guide.
6. After the Cut: Regrind or Replace
End mills are one of the few tool types where regrinding genuinely pays - but not every tool, and not every time.
| Article | When to read it |
|---|---|
| When to Regrind: Five Signs | Unsure whether it is time to send it out |
| Regrind, Outsource or Replace | When the cost comparison has to be made |
| How to Regrind a Milling Cutter | Grinding in house and needing the order |
For regrinding across every tool type - drills, taps, reamers, gear cutters, broaches - see Tool Regrinding: A Complete Reading Guide; to work back from a wear pattern to tool-life management, Tool Life and Wear: A Complete Reading Guide.
7. Frequently Asked Questions (FAQ)
Q: Where should I start in these 20 articles?
It depends on the problem in front of you. Buying tools and the catalogue makes no sense: start with End Mill Parts Explained in section 2. Terms already clear and you need to decide what to buy: section 3. Cutter in hand and setting conditions: section 4, especially effective diameter and chip thinning. Cutting right now and something has gone wrong: section 5. The tool is dull and it is a regrind-or-replace call: section 6. Toolpath planning is not on this line - that is a separate guide.
Q: Why are toolpaths not part of this line?
Because the criteria differ and so does the decision maker. Choosing a cutter turns on edge form, flute count, grade and length, and is usually settled on the shop floor and in purchasing; a toolpath turns on radial and axial widths, entry moves, corner handling and scallop height, and is settled by whoever writes the program. Put both in one article and the reader is jumping between two sets of criteria. In practice they meet - one chatter problem can be fixed at the cutter or at the path - so the two lines point at each other while each stays complete.
Q: More flutes or fewer?
It depends on whether you are short of chip room or short of teeth. Fewer flutes mean deeper gullets: better evacuation, suited to roughing and gummy materials. More flutes mean more cutting edges: higher feed at the same rpm and a better finish, but shallower gullets that pack as soon as the chip load rises. Work in that order - material and depth of cut set the evacuation you need, and only then look at how many flutes will fit. The flute-count article in section 3 unpacks the trade-off; variable pitch in section 2 is the separate trick of using uneven spacing between teeth to suppress chatter.
Q: The cut is singing. Is that the tool or the machine?
First separate forced vibration from self-excited chatter, because the fixes point in opposite directions. Forced vibration tracks spindle speed, so changing speed changes it. Chatter is the system resonating, and changing speed can make it worse - the lever there is rigidity: shorten the overhang, change the clamping, alter the widths of cut. The fastest sequence on the machine is to check overhang and clamping first, then whether the radial and axial widths sit in a resonant band, and only then consider a variable-pitch cutter. Two articles in section 5 cover exactly this.
Published: 2026-09-09 | Last updated: 2026-09-09









