
Drill Bits: The Complete Guide - Start From Depth-to-Diameter, Then Pick the Drill and Set the Conditions
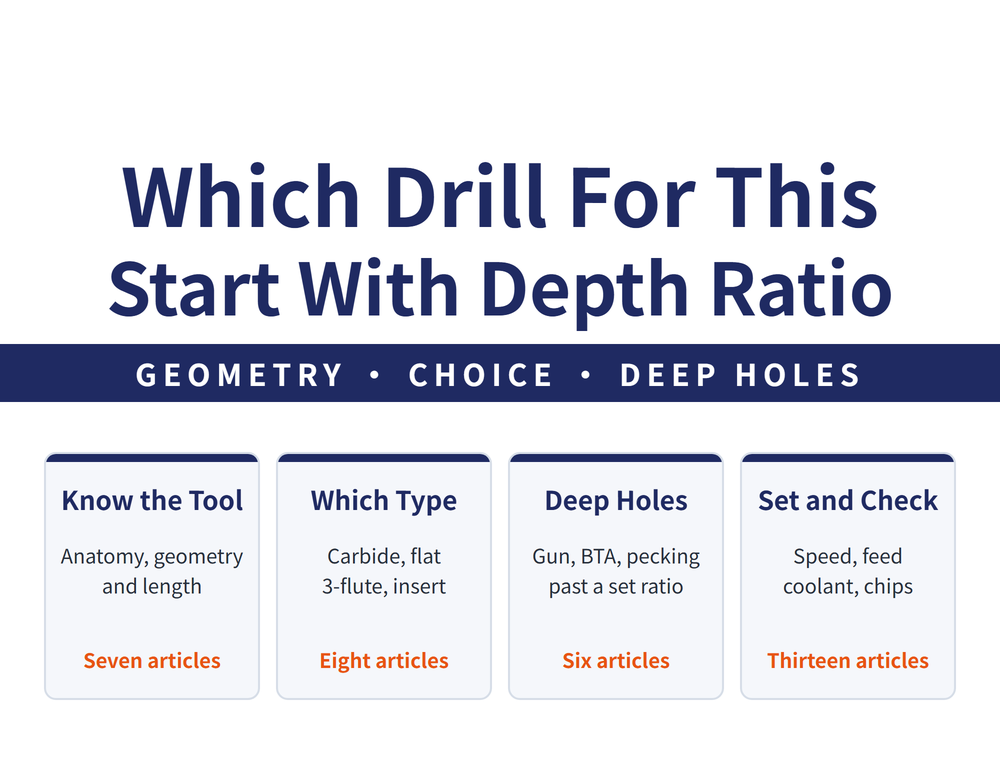
Drilling a hole means deciding three things: which drill, what conditions, and how to diagnose it when it goes wrong. Upstream of all three sits one number - the depth-to-diameter ratio. For shallow holes an ordinary twist drill and matched conditions are enough; past a certain ratio the drill, the coolant delivery and the chip evacuation are all replaced by a different method entirely. These 42 articles follow that order, ending with what comes after the hole and how to regrind the drill.
1. Three Separate Decisions in One Hole
These get asked as one question, but each looks at something different. Separate them and the answers become findable:
| What to decide | What it looks at | Section |
|---|---|---|
| Which drill | Diameter, depth ratio, material, hole type | Sections 2-4 (21) |
| What conditions | Speed, feed, how the coolant gets in | Section 5 (7) |
| How to diagnose | Chip shape, wear pattern | Section 6 (6) |
The dividing line on this whole line is the depth-to-diameter ratio. Below it you are choosing a drill; above it you are choosing a whole method - drill, coolant supply and chip evacuation all change. That is section 4, and it helps to know it exists before you start.
2. Know the Tool: Structure, Geometry and Length
These seven are the groundwork for reading a catalogue. If the names do not line up, the later sections will not either.
| Article | When to read it |
|---|---|
| Drill Bit Anatomy | The entry point. Get the names straight first |
| Helix Angle, Web and Point Angle | To see how geometry drives the cut |
| Point Types and Thinning | To tell the various point forms apart |
| Shanks and Morse Tapers | To confirm the shank actually fits |
| Straight Shanks and Runout | Oversized holes traced back to the shank |
| Flute Length and Rigidity | When choosing a flute length |
| Stub, Jobber and Taper Length | When torn between short and long drills |
One rule here saves real money: never use a longer drill than the job needs. Rigidity falls away faster than the length grows, and hole position and tool life go with it.
3. Which Type of Drill: By Material and Hole Form
"Drill" is not one tool. A different hole form calls for something genuinely different.
| Article | When to read it |
|---|---|
| Choosing a Carbide Drill | Read this first. How it differs from HSS |
| Flat Drill, Twist Drill or End Mill | All three can make a hole; pick one |
| Flat Drill Machining | Flat-bottom holes or inclined surfaces |
| Flat Drill Applications | Pilot holes and tap drilling combined |
| 3-Flute Drills | Precision holes, or hard material |
| Indexable Drills | Larger holes, changing inserts not drills |
| Center Drills | Center holes, and the A/B/R forms |
| Center Drill Parameters | Setting conditions for a center drill |
Start with the material article. Carbide and HSS are not "better" and "worse" - they ask different things of machine rigidity and spindle speed, and where the machine cannot keep up, carbide is the one that chips first.
4. Deep Holes Are a Different Method, Not a Longer Drill
Past a certain depth ratio, the question stops being "will it cut" and becomes "will the chips get out and will the drill run straight". The whole method changes.
| Article | When to read it |
|---|---|
| Deep-Hole Methods Overview | Read this first. Three methods compared |
| Peck Drilling | Pushing an ordinary drill somewhat deeper |
| Through-Coolant Long Drills | Deep holes with internal coolant |
| Small-Diameter Deep Holes | Deep and small in diameter at once |
| Gun Drilling | Self-guiding cut, tight straightness |
| BTA and Ejector Systems | Larger bores, coolant supply and sealing |
The order of this section is itself the criterion: pecking makes the drill you already have survive; gun drilling and BTA are machinery built for depth. The first is cheap but has a ceiling; the second needs dedicated equipment and puts depth and straightness in another class.
5. Setting Conditions: Speed, Feed and Coolant
The same drill can last many times longer or shorter on conditions alone - and how the coolant gets in often matters more than the rpm.
| Article | When to read it |
|---|---|
| Drilling Parameters | Read this first. Speed, rpm and feed |
| Parameter Conversion | Recalculating after a diameter change |
| Hole Machining Formulas | When cycle time has to be in the sum |
| Feed Rate and Chip Control | Chips wrapping, and the feed needs work |
| Cutting Fluids Compared | Choosing water-soluble or neat oil |
| Through-Coolant Types | Using internal coolant, sorting the types |
| Why Dry Drilling Is Hard | When the coolant has to come out |
The three calculation articles are for looking up, not memorising. The one that earns its keep daily is feed and chip control - the shape of the chip tells you immediately whether the feed is right.
6. Diagnosing Trouble: Read the Chips and the Wear
When drilling goes wrong, the two easiest things to do on the machine are look at the chips and look at the cutting edge. Both point back at the cause.
| Article | When to read it |
|---|---|
| Drilling Troubleshooting | Read this first. Breakage, size, burrs |
| Chip Formation | Reading the state of the cut off the chip |
| Recognising Wear Patterns | Telling wear apart from chipping |
| What Drives Tool Life | Short life, looking for a systemic cause |
| Drill Performance Factors | Design, conditions and machine at once |
| Inclined and Irregular Surfaces | An uneven entry face and a walking drill |
One sequence is worth fixing as a habit: chips first, edge second, parameters last. Done the other way round, you spend the afternoon adjusting something that was never the cause.
7. After the Hole: Downstream Operations and Regrinding
Drilling is usually only the first cut. Holding a tolerance, tapping, counterboring - each is another operation; and the drill itself can often be brought back.
| Article | When to read it |
|---|---|
| Improving Hole Accuracy | The drilled hole misses the tolerance |
| Drill and Tap Sequences | Planning tool order for each hole type |
| Three Tools After the Drill | Regrinding core, precision and counterbore drills |
| How to Regrind a Drill | Read this before grinding. Three angles |
| Points for Different Materials | The material changed and the point must too |
| Still Not Lasting After a Regrind | Life is still short after grinding |
| Ten Ways to Regrind | Naming the weakness before picking a method |
| Regrinding Carbide Drills | When the drill on the bench is carbide |
For hole accuracy in full, follow Hole Accuracy: A Complete Reading Guide; for the threading half, Thread Machining: A Complete Reading Guide; for regrinding across all tool types, Tool Regrinding: A Complete Reading Guide.
8. Frequently Asked Questions (FAQ)
Q: Where should I start in these 42 articles?
Measure two numbers first - hole diameter and hole depth - and work out the ratio. A modest ratio sends you to section 3 to pick a drill by hole form; a large one sends you straight to section 4, which is a different method. If the terminology is the obstacle, start with Drill Bit Anatomy in section 2. Already drilling and only adjusting conditions: section 5. Something is failing and you want the cause: section 6. This line is deliberately not meant to be read front to back.
Q: Drills keep breaking. Is that the tool or the conditions?
Look at the chips before deciding. Long stringy chips, or chips packing into the flutes, mean an evacuation problem - the fix is in section 4 (pecking, through coolant, a different method), not a lower feed; dropping the feed too far actually makes chips longer and harder to break. If the chips look right and drills still break, then look at the tool: flute length too long, shank runout too high, entry face uneven. Reverse that order and the usual outcome is ever more conservative parameters with the problem still there.
Q: Carbide drills cost more. When is the switch worth it?
It depends where your bottleneck is. If the bottleneck is machine hours and the machine has the rigidity and the speed range, carbide lets you raise cutting speed and cost per hole can fall. If the bottleneck is tool changes or breakage, carbide may not help - it resists wear but is more brittle, so with insufficient rigidity, high clamping runout or an uneven entry face it fails earlier than HSS would. Confirm those three conditions hold before making it a material question.
Q: When is a drill past regrinding and simply scrap?
Two tests. First, whether the geometry can be recovered: damage reaching the chisel edge or the outer corner, or a drill ground back until the usable flute length is gone, will not return to its original performance. Second, how it behaves after grinding: if a reground drill lasts markedly less than a new one, either the grinding method is wrong or this particular drill has reached its end, and two articles in section 7 cover how to tell those apart. Separately, self-guiding tools such as gun drills are never ground freehand - that is a job for equipment, not for feel.
Published: 2026-09-09 | Last updated: 2026-09-09









